Blank Form

Our TYPO3-based Website-Base includes an extension with which you can conveniently edit forms and integrate them on your page. – The sg_forms TYPO3 extension provides a backend module with which you can create forms according to individual wishes and needs and without programming knowledge. With the corresponding content elements or plugins, the created forms can be easily integrated into the TYPO3 site. In the section below, you will find detailed documentation on how to use the TYPO3 module, followed by a tutorial for the forms content elements.
You can create and edit the forms you have set up in the Forms module. You will use them to give visitors of your site a possibility to contact you or to subscribe to a newsletter.
While editing forms, you are free to decide which information the user has to leave and which information the user can provide voluntarily. Existing forms can be adapted at any time and any number of new forms can be created. When creating forms, you will quickly become familiar with the functions and work with this module.
Forms – Overview
The first thing you see when you click on the Forms module is an overview of all available forms. You can now edit a form by clicking on the pencil icon or the form name. With the second icon you duplicate a form and with the recycler icon you delete it.
Use the + Create new form button above the content area to create a new form.

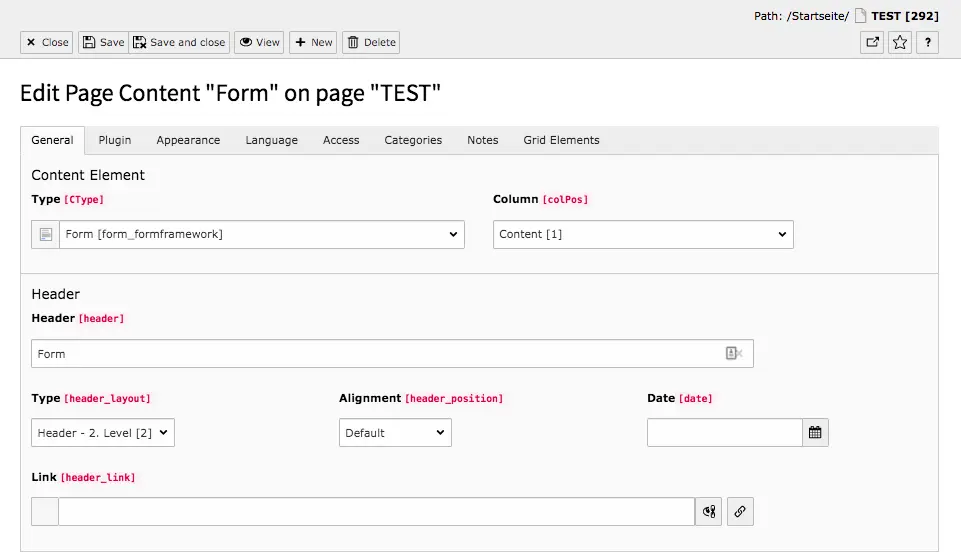
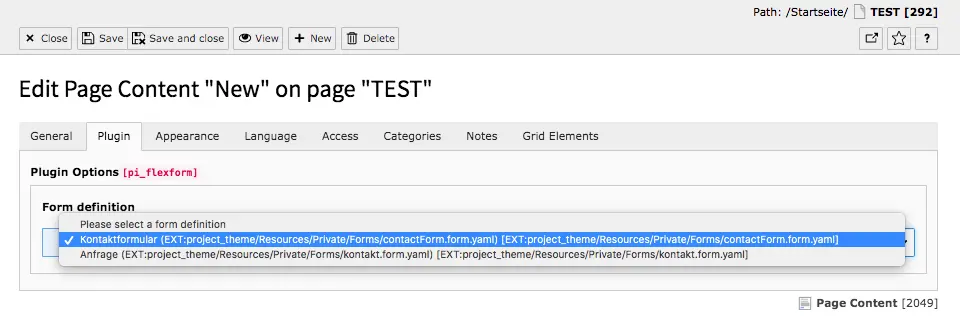
A created form can be used as often as you like. To do this, you only need to add a form content element in the page view (or list view) and select the form in the plugin.
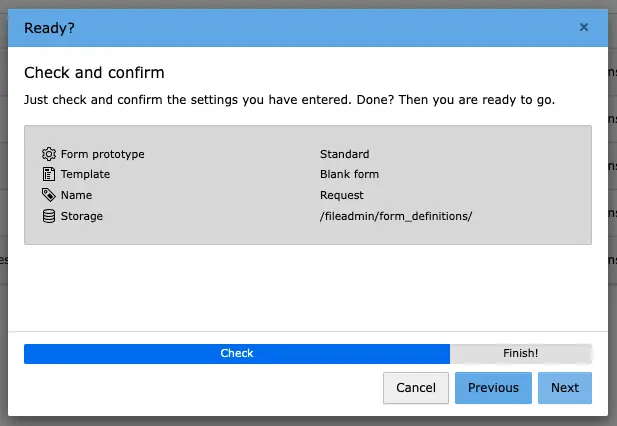
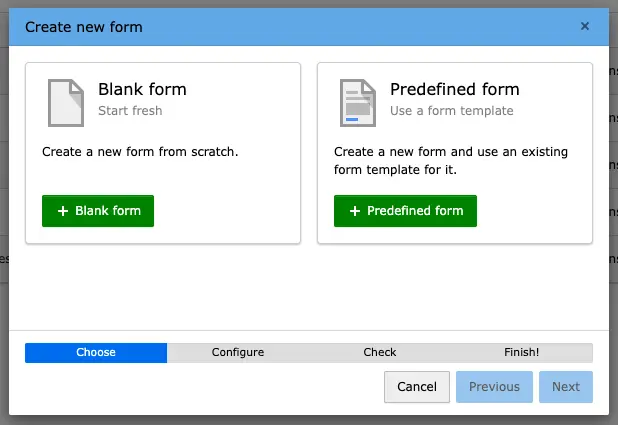
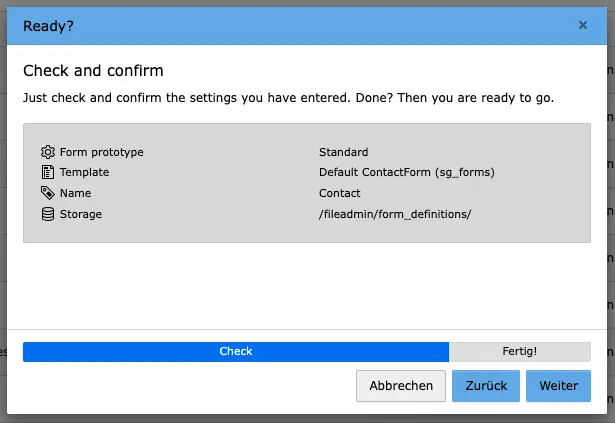
First you have to choose between a blank and a predefined form. In the blank form, you only have to define a form name and the form storage. The name can be changed at any time. For a predefined form, you must also select a start template. In our Website-Base you will find a template for a simple contact form consisting of two pages/steps, which already contains a privacy notice.
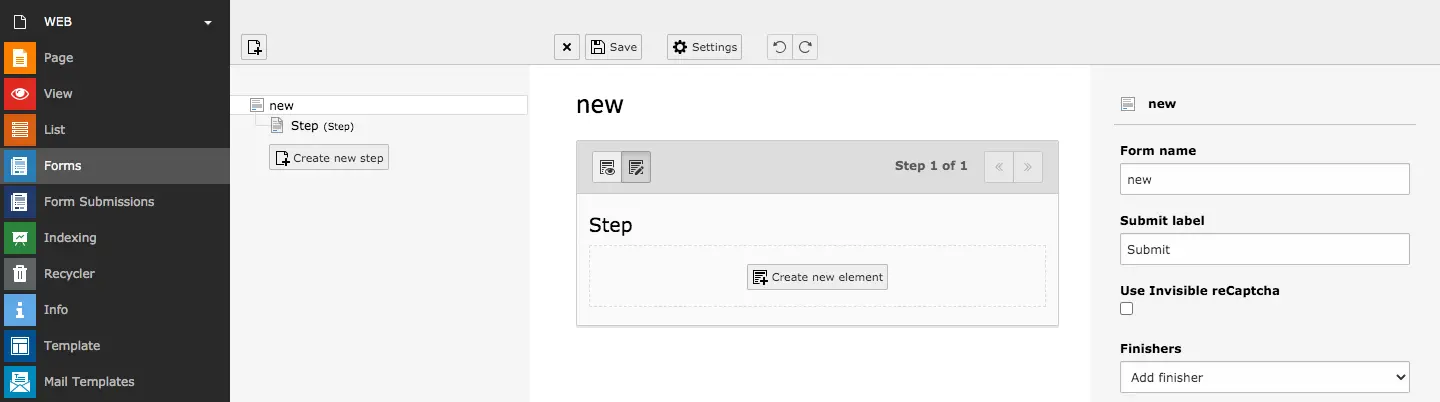
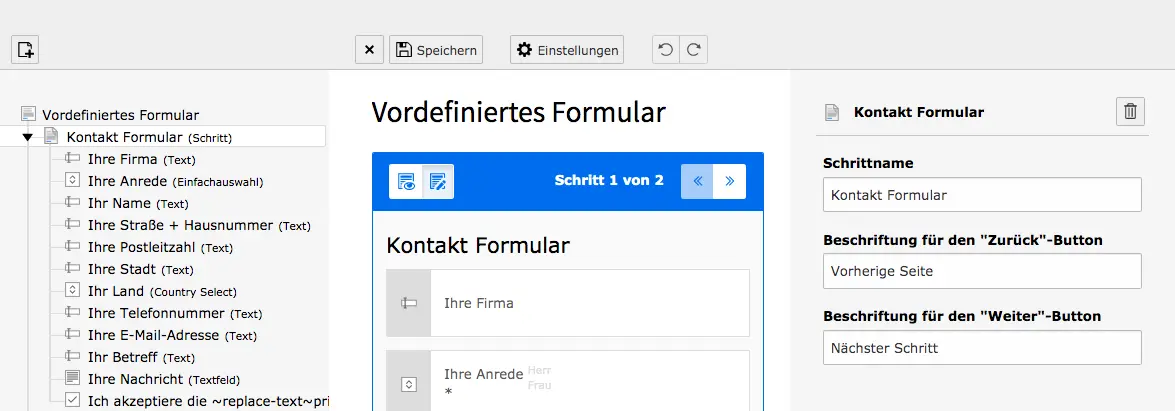
After creating the form you will get to the editing view.


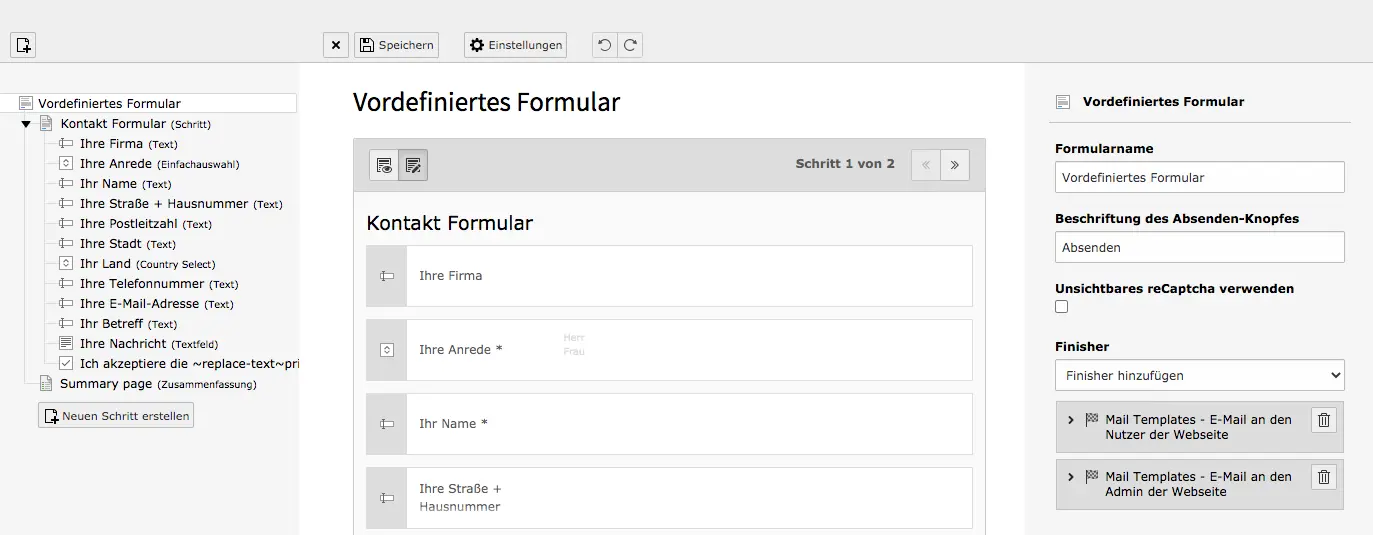
On the left is the column in which a form page tree can be seen. A page is automatically created in the blank form. There are two pages in the predefined form. Pages can be added or deleted at any time.
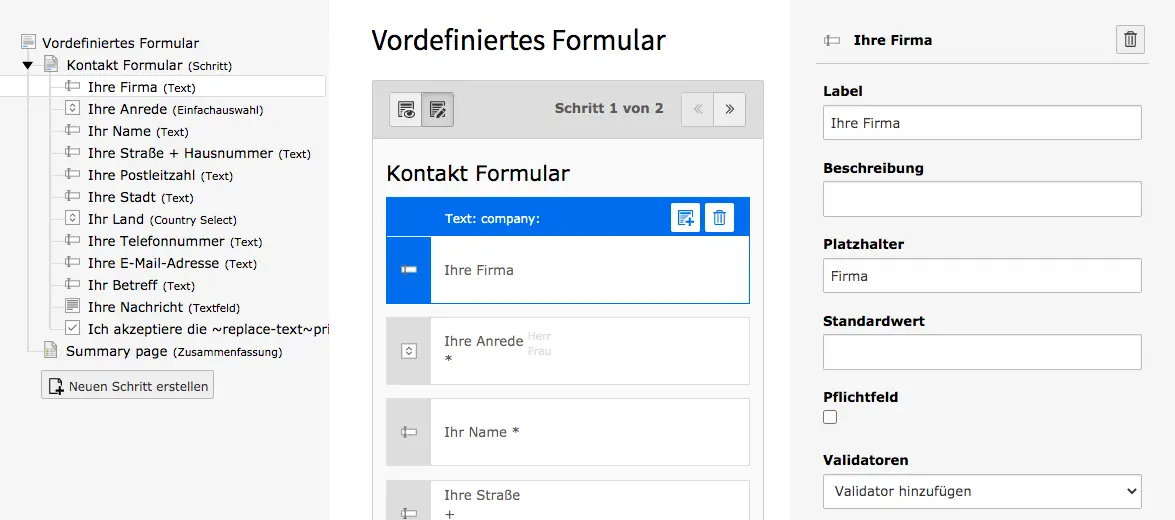
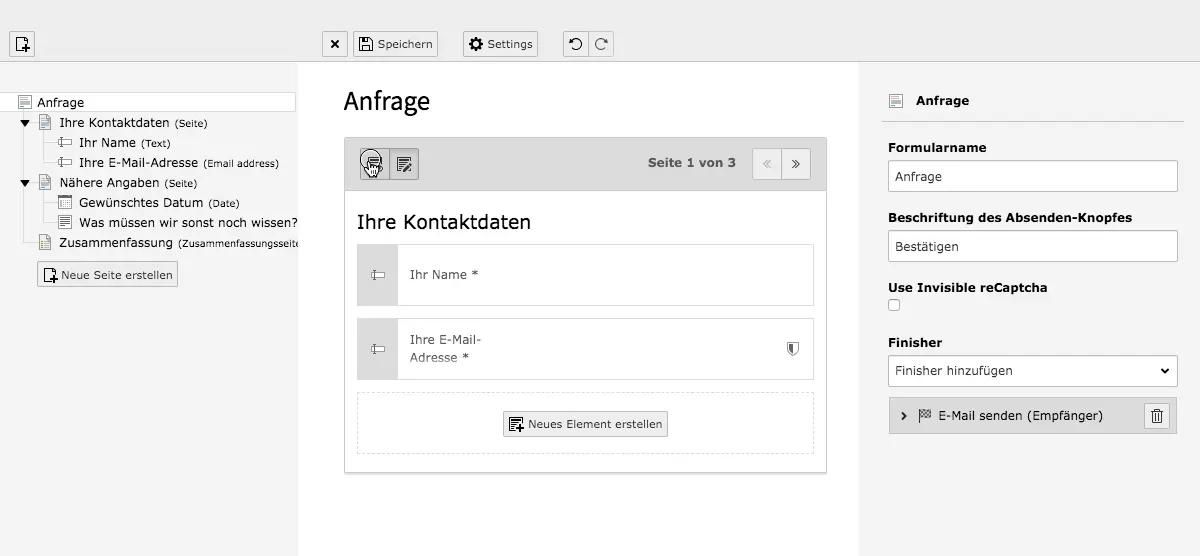
In the middle, you add the individual form elements and select them for editing. Each element can also be selected using the form tree. If you have selected a page in the form page tree and not a single element, all elements are simply listed in the middle. Each element can be clicked on in this view, so that you can access the element's settings (right column).
In the right area, you can adjust the settings for the form, the contained pages and the individual elements.
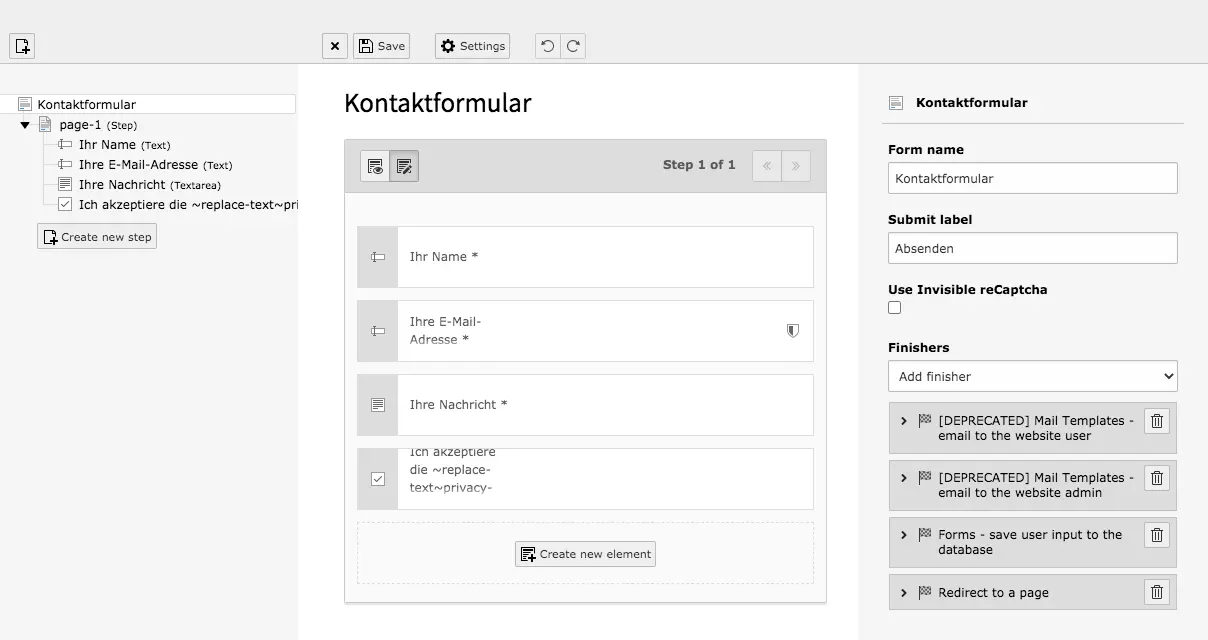
If you select the form name in the form page tree, you can customize general information about the form in the right column.

Finishers determine how information and files are handled when the user sends his information and who should be informed. You should observe the order of the finishers. Users and the Admin should always be notified first. If you do not want to save uploaded files in the system, the e-mails are followed by the deleting the uploads. Only at last a Finisher is placed to redirect the user to another page. You should refer to either an internal page or an external URL. We present the individual finishers below. You can find more information about finishers on the typo3.org website.
Email to sender (form submitter)
An email is sent to the person who completed the form.
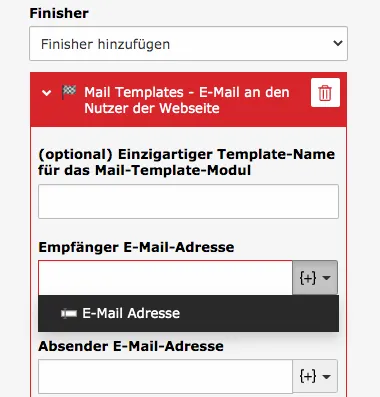
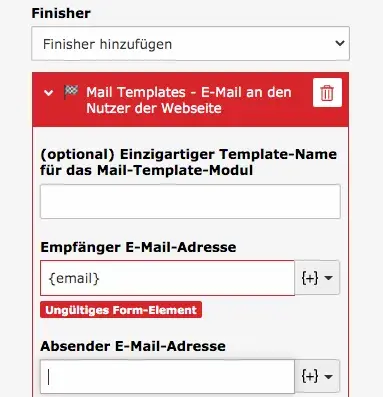
Mail Templates – email to the website user
With this finisher the user will be contacted at the given address. To do this, the email element must already be inserted in the form (or another element containing an email address). If the element is present, the element with the address can be selected in the required field. Additionally, you can specify a mail template, e.g. contact_user.
Email to receiver (you)
An email with the details from the form will be sent to a selected e-mail address.
Mail Templates – email to the website admin
After submitting the entries, the admin of the site can also be notified. For this purpose, only the corresponding email address must be entered. Here you can also use the mail templates, in this case: contact_admin.
Redirect to a page (Respect the order! Redirects should go last)
After submitting the data, you can redirect the user to an internal page.
Delete uploads
Prevents uploaded files from being saved in the system. The files are then only sent as attachments in the emails.
Confirmation message
The person who has filled in the form will be shown a confirmation after submitting the data.
Forms – save user input to the database
Normally, user input is stored on the domain start page. If you want to specify a different page, you must enter the corresponding Page ID in this Finisher.
Redirect to a URL (Respect the order! Redirects should go last)
Or you direct him to an external page, e.g. a landing page. Just enter a URL for this.
Rename uploaded file
You can use this finisher to ensure that uploaded files are named consistently.

This finisher makes it possible to send the completed form as a PDF to an admin and/or to the user's e-mail address after the form has been sent. It is also possible to make the PDF available for download on the confirmation page after submitting the data.
This finisher is not part of our website base and was developed at the customer's request. However, the sg_forms_pdf extension can also be implemented on other instances if required. For the implementation, you first need a PDF file with a form and fillable form fields as well as a TYPO3 form. A data record of the type PDF template must then be created with the PDF file. The form fields in the PDF file must then be linked to the form fields in the TYPO3 form. Finally, the finisher Convert PDF to form is added to the form. The previously created PDF template must then be selected in the finisher.
Further options are:
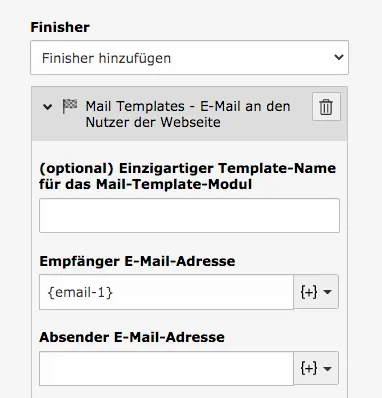
Finisher-Example: Mail Templates – email to the website user

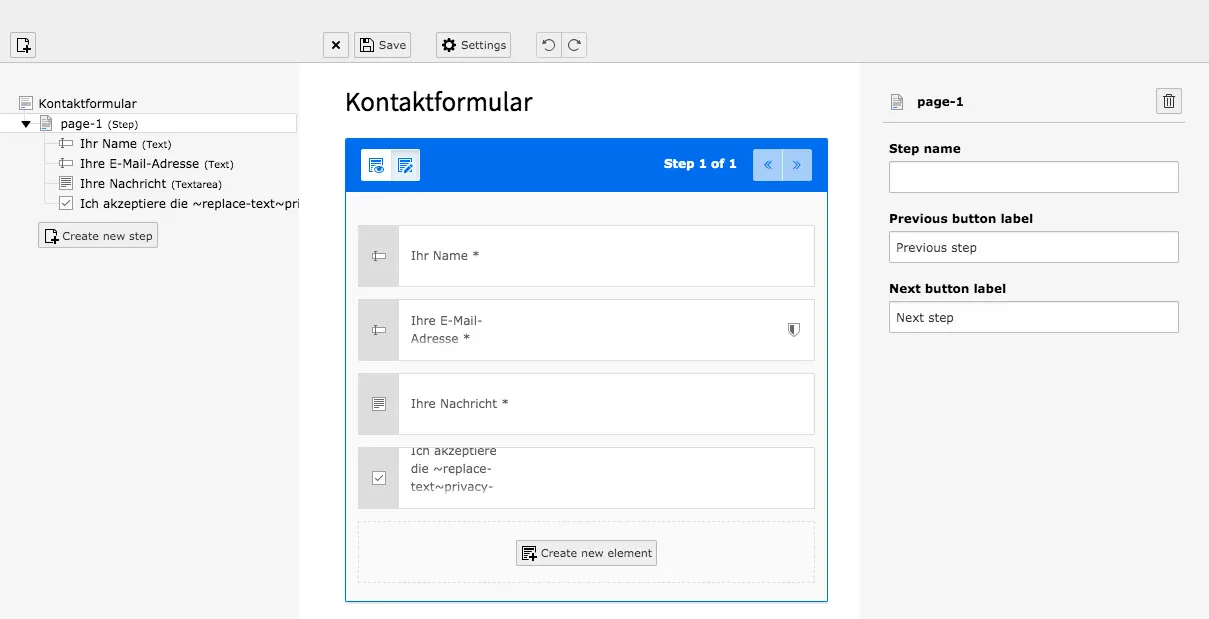
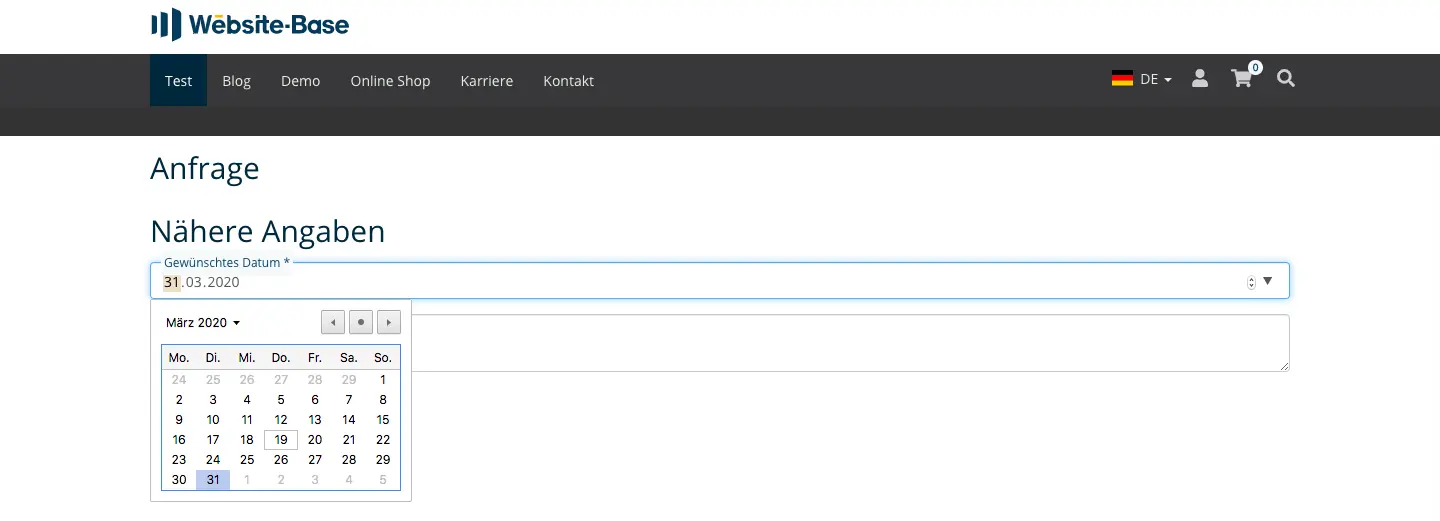
If you have selected a page in the form page tree, you can specify the step name and the label of the Previous and Next buttons. These settings must be made for each individual page. Where the buttons can then be seen on the page is shown in the frontend images of our example form.
To add a new step, click on the Create new step button in the form tree on the left. The page can then be filled with the elements of your choice.
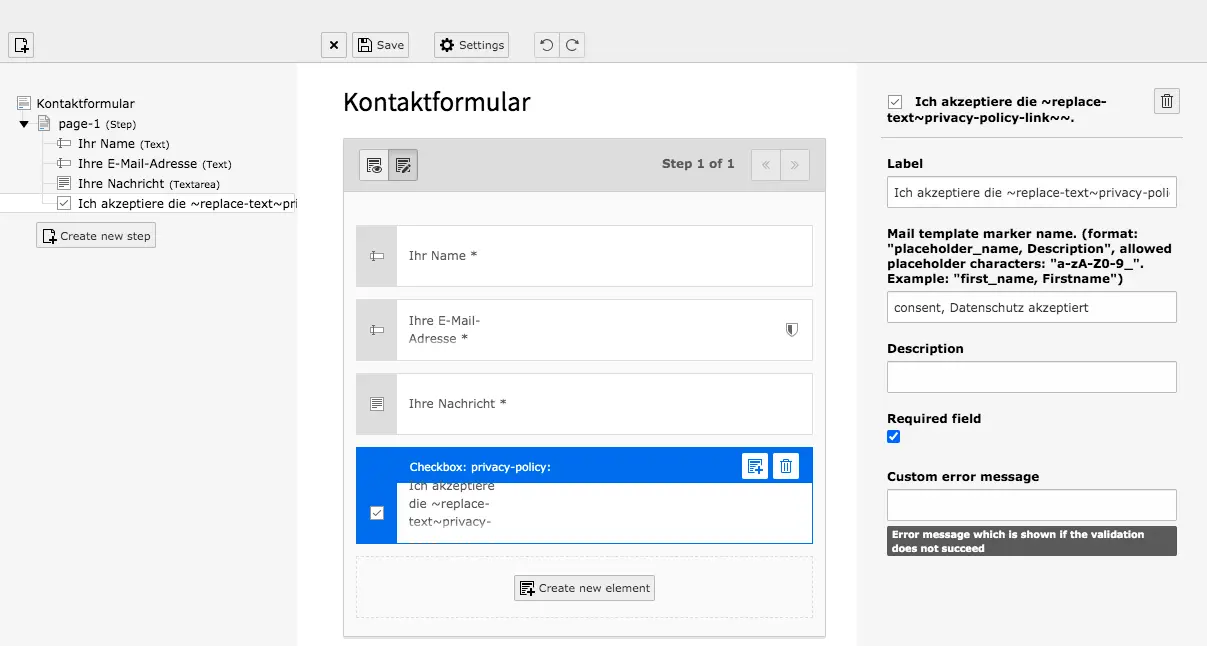
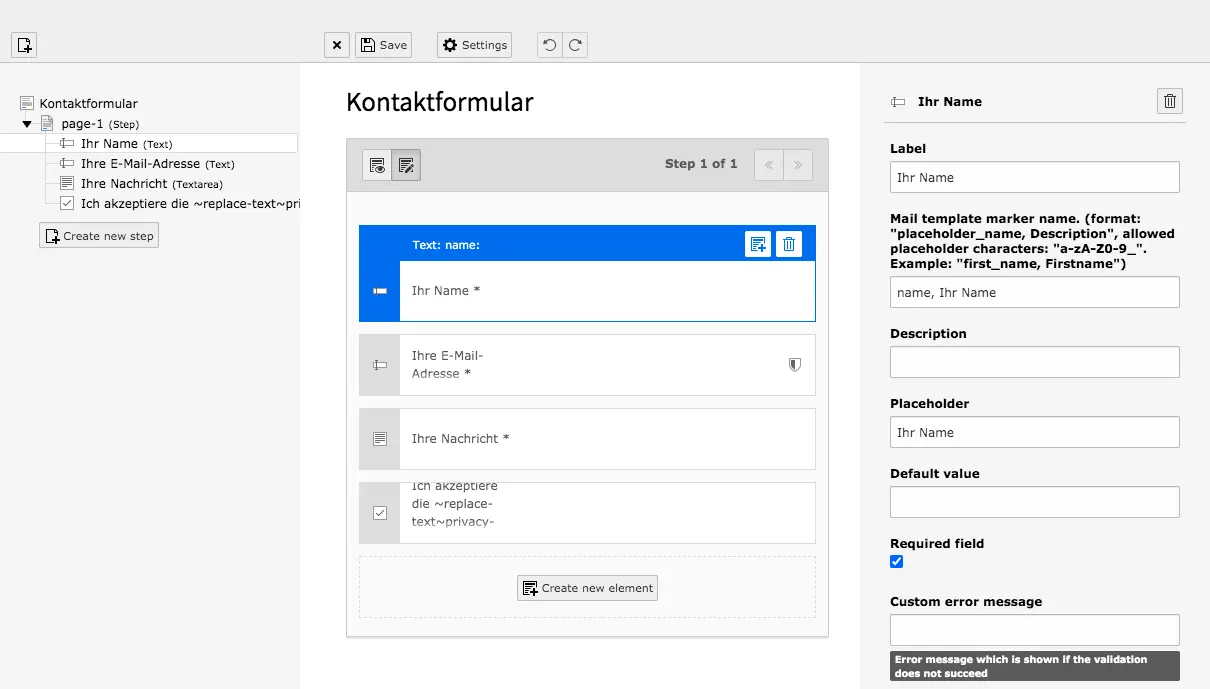
When an element is clicked or added, you will see some fields that can be filled in. Most important are the label of the element, the placeholder, whether it is a required field and possibly validators.
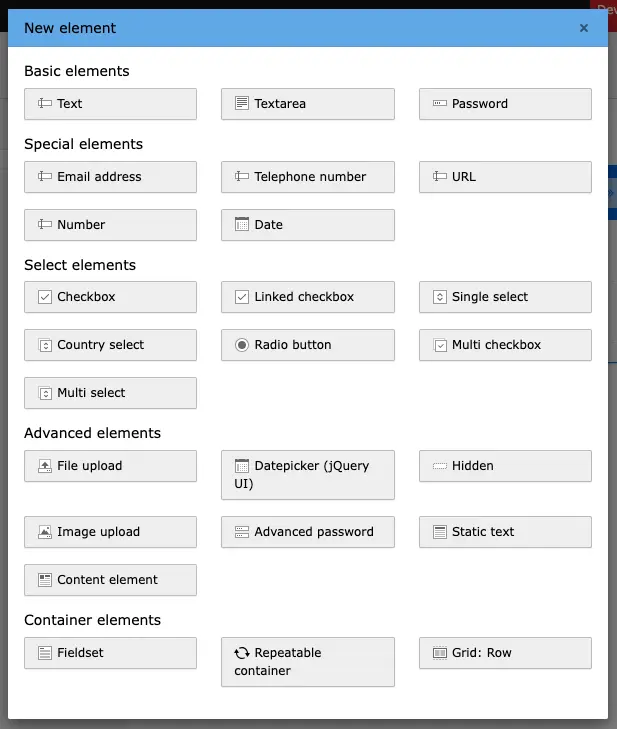
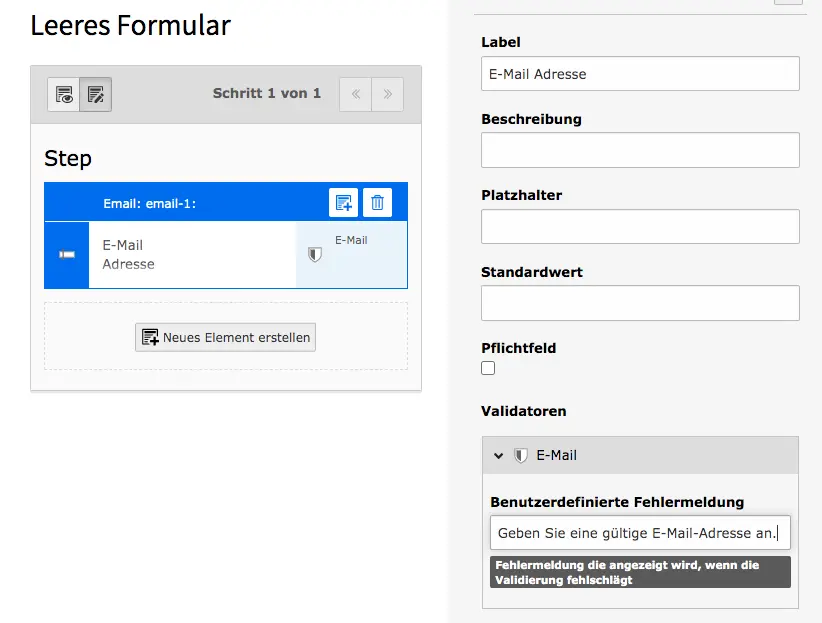
To add a new element, select a page/step and click on the button Create new element in the middle area at the bottom. Then select what you need from the list of elements. You can see the available elements in a screenshot of the empty form.
A special form element is the Repeatable Container, in which single or multiple elements can be placed. This allows users to make multiple entries for the fields in the container, e.g. multiple appointment options. A user can repeat the information as often as needed - the maximum number of repetitions is defined in the element settings. You can also set a minimum number of repetitions. Added lines can be deleted with a remove button. You define the button label, as well as the label of the button for repeating/adding an entry.
Validators can be assigned to individual form elements. They control or limit the input of the users in the frontend. Not all validators are available for all elements. Some elements automatically contain a validator, such as the email element, while others have no validator selection. Optionally, you can add an error message to each validator, which appears if the validation fails. The following validators are available. You can also find more information on validators at typo3.org.
Every contact form that requires the provision of personal data (e.g. name or e-mail address) must contain a data protection notice. When configuring this element, orientate yourself on the contact form already created in the Website-Base. In the predefined form, which contains a simple contact form, there is also a privacy notice.
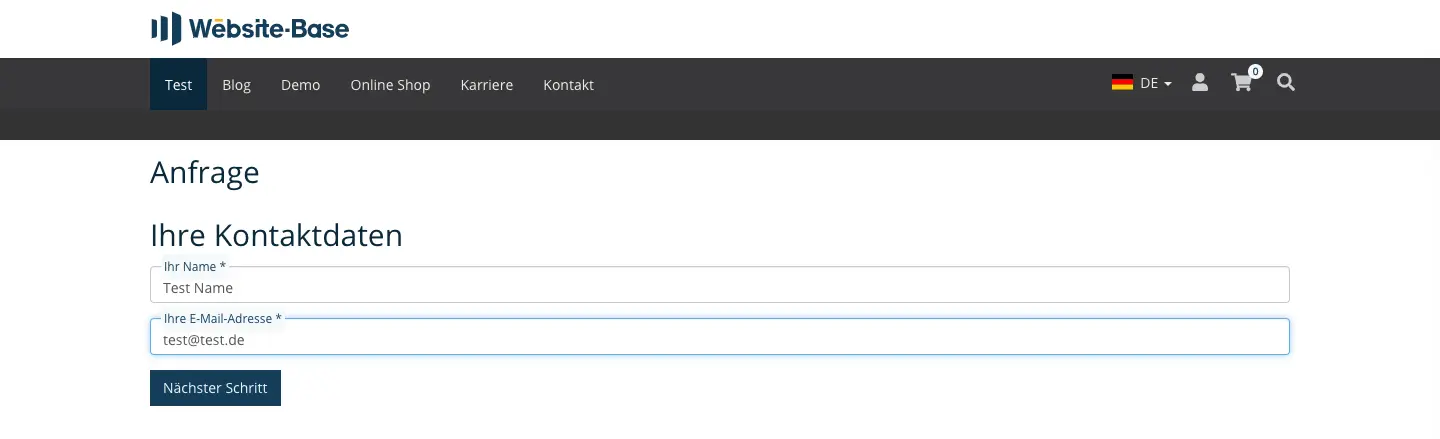
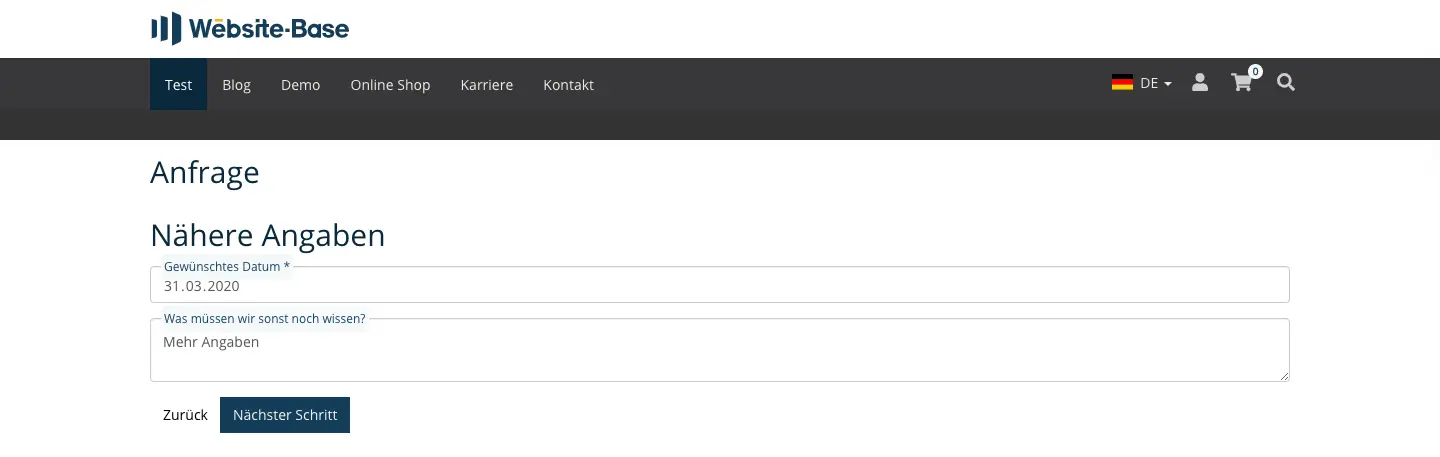
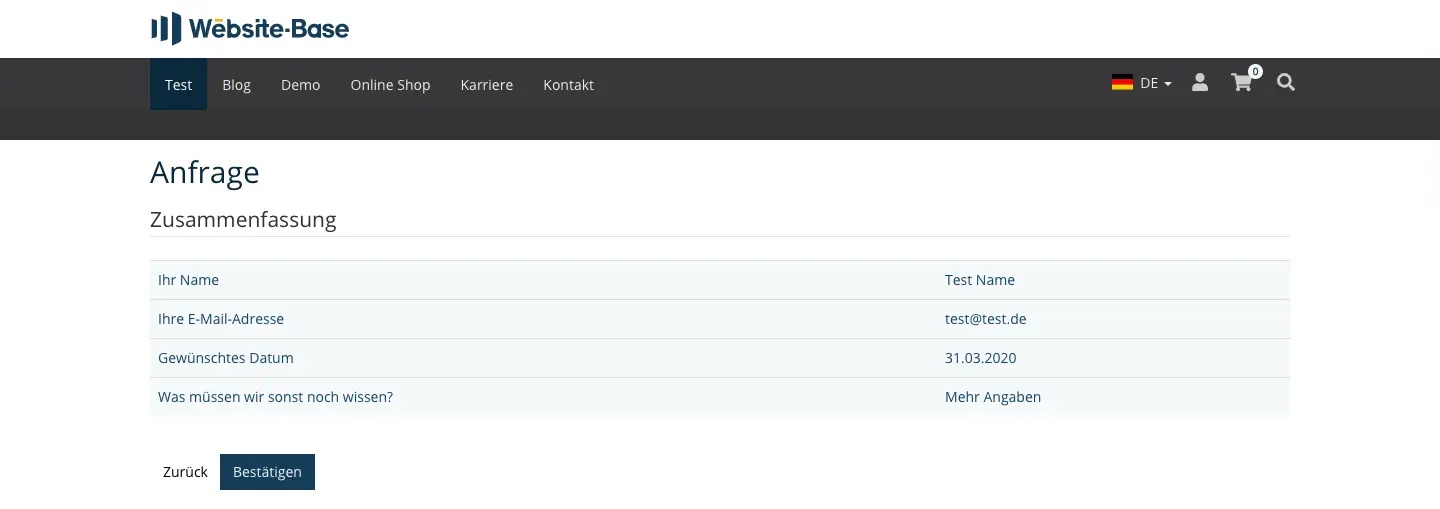
Example form with three pages in the frontend
Preview of a Form in the Backend
Form elements provide a possibility for site visitors to interact with the site or to get in contact with the site operators. The integration of the corresponding content elements is uncomplicated and can be completed in a few moments.

The content element form allows a visitor of your site to contact you and leave a message. You will find a standard form in the Website Base. You can customize this form in the Forms module or create a new one.
The General tab has the same fields as the Header only content element. In this tab you only decide whether the form should have a heading.
In the Plugin tab, you only need to select the required form. If you only have one or two form definitions, the selection will not be difficult.
Once you save the content element, the form in the frontend looks like this or something similar to the picture below.


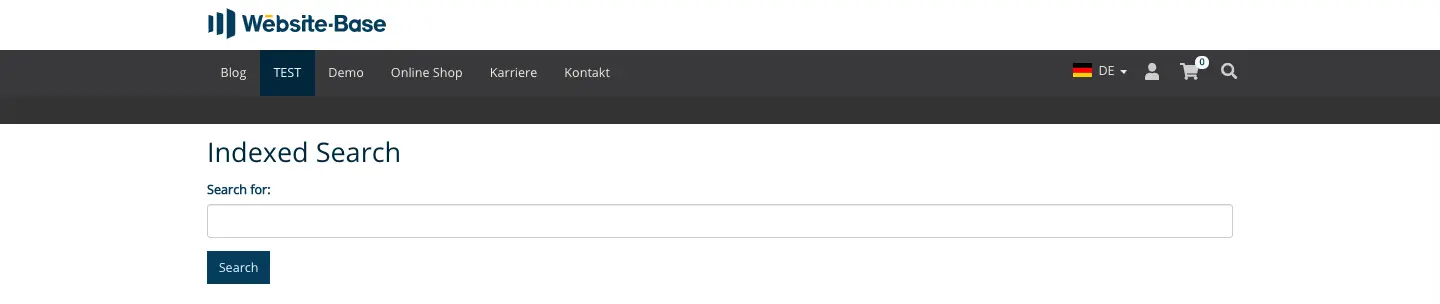
With the indexed search, users of your site can search specifically for the information they need. The content element indexed search is a plug-in, an additional element in the TYPO3 system. Therefore, the index search is marked with the symbol for plug-ins in the content area.
The tab General corresponds to the content element Header only. Here you define only whether the content element should have a title.
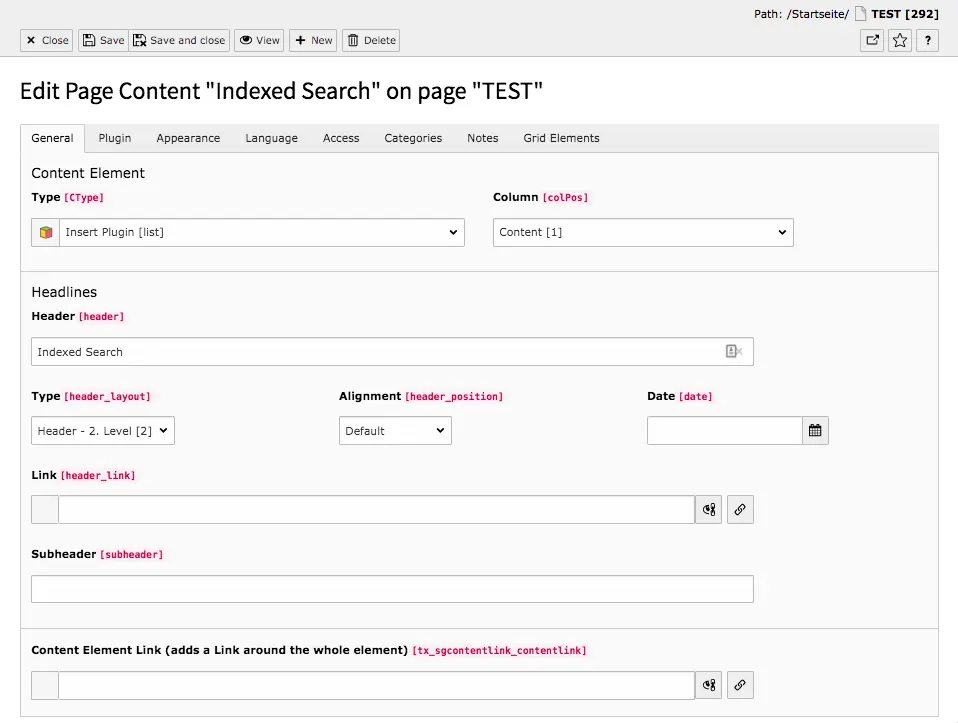
Since the indexed search is a plug-in, as mentioned above, it is possible to add it by inserting a general plug-in. Then the plug-in must be selected, which is already automatically activated for the content element index search.
The indexed search is ready to use immediately after creating and Save the content element. In the frontend it looks like the picture below.

Would you like to know more?
All information about the available editions can be found on the webpage for our TYPO3 Website-Base. You have the possibility to get a Website at a Fixed Price or you decide for a Website as a Service package, with which no further costs for hosting or security and function updates will come up to you.