NEW: SG AI – YOUR AI ASSISTANT FOR TYPO3 – SEO, (IMAGE-) TEXT, IMAGES & MORE!
Content Area & Contents
Above the content area in the page module, there are useful functions that we would like to briefly introduce to you.

First, you can choose between Layout and Language Comparison modes using the menu at the top left above the content area. The default setting is Layout mode. Then you will see two buttons (Show Web Page & Edit Page Properties) above the content area, which can be found next to the page title in Language Comparison mode. In Language Comparison mode, individual languages or all languages can be displayed side by side in the content area, which can make translation easier, for example.
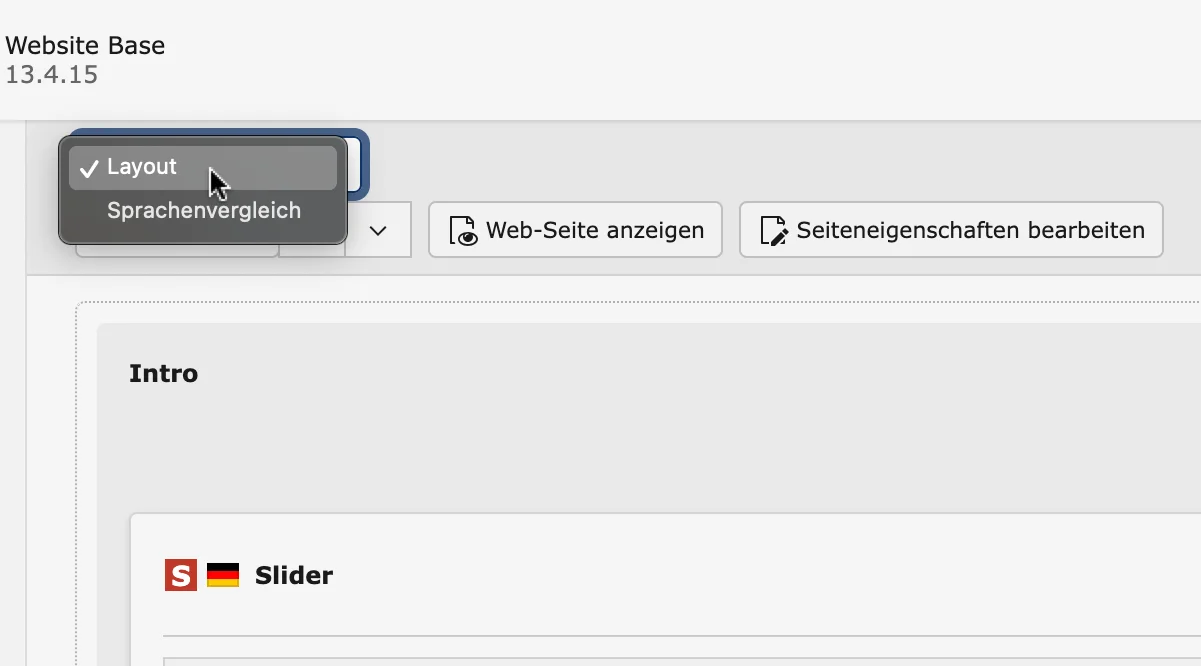
Selection between layout and language comparison
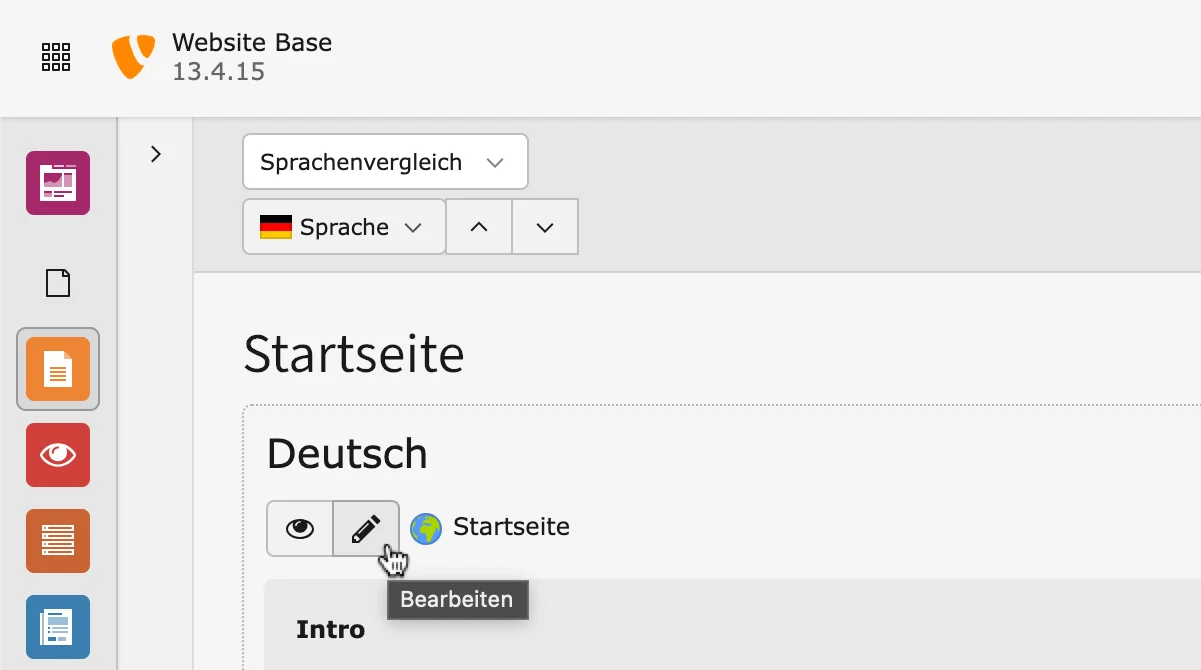
Buttons in language comparison
The Show Web Page button displays the frontend of the page you are currently viewing in the back end in a new tab. This button can be found in the language comparison directly next to the page title. The Edit Page Properties button takes you to the settings for the current page.
There are additional buttons on the right:
- The flash button clears the cache of the page you are currently viewing. This is sometimes necessary to make changes visible in the front end.
- The double arrow button can be used to reload the backend page.
- You can display hidden content with the View option. These are content elements that are not activated. This can be used to improve clarity.
- Under the share button, you can bookmark the page or copy the link to the backend page and share it with your team, for example.
You already know that the structure of the content in the frontend is similar to that in the backend. Therefore, the content area looks different on each page, since different content and content elements are used. The following section describes the functions that you can find in the content area of the page module.
Via the + Content button
On the left above and below each content element there is a button for creating a new page content.
- Click on the + Content button for adding a new content element at the position where you want to insert the new content.
- Select the content element you need.
- The mask with the content properties appears. You can insert your content immediately.
- Save your changes

To edit a TYPO3 content element, simply click on the pencil icon located in the upper right corner of each content element. Depending on the type of content element, you can change a text, add an image or control the availability of the element in the element properties.
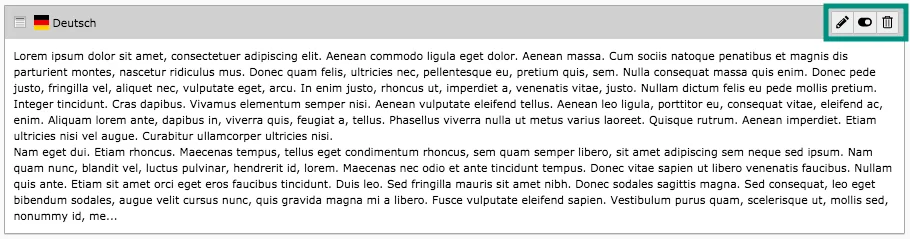
With the switch in the upper right corner of a content element, a content can be shown or hidden manually. This can be very useful if you don't want information to be immediately available to the public. This allows you to prepare your content and show or hide it as needed.
Should an element have become obsolete, it can be deleted by clicking on the recycle bin icon.
If you click on it by mistake, it is no problem - TYPO3 will ask you again if you really want to delete an element. If you deleted an element by mistake, follow the instructions for undoing actions.
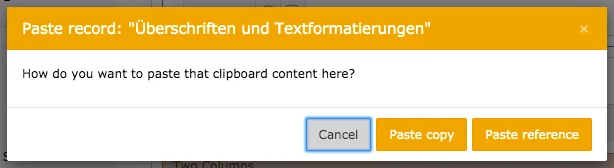
Before you copy or reference an element, the difference between the two options must be explained briefly: With a copy, you duplicate a content element in such a way that another individual content element is generated. Original and copy can be edited independently of each other. With a reference you can only adjust the original element but not the references. The contents of the reference always correspond to the original element. All changes are immediately visible in the references – A copy is created, for example, if a similarly structured element is required. A reference can be useful if the same content is repeated on many pages, such as CTAs.
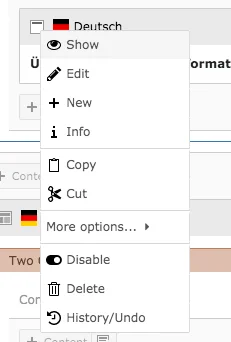
In the upper left corner of each content element, there is a small icon (the icon of the content element in use) that can be used to open a menu with various options:
- Expand the context menu of the content element.
- Choose the Copy option.
- Another symbol for inserting the copy now appears at the left above and below each content element. Click on the symbol at the selected position.
- A window appears with the options Paste Copy and Paste Reference. Choose an option.
- You have now inserted a copy/reference of a content element.

You can easily copy content on one page and then paste copies and references on another page.
Just change the page in the page tree after copying.
The two methods described below are more or less suitable for moving elements, depending on the size of a page. The Drag & Drop variant is the faster one if a content element and its destination to each other within the page. Moving using the Cut option is more practical if the content element is more than 2-4 other content elements away from the target.
If the content element is to be moved to another page, only the variant using the context menu works.
Using the context menu
- Expand the context menu by clicking on the symbol of the content element.
- Choose the option Cut.
- Another symbol for inserting the cut element now appears on the left above and below each content element.
- Click on the symbol at the selected position. It can also be located on another page in the page tree.
- Click on Move in the selection that appears.
Via Drag & Drop
- Click in the upper gray area of a content element and hold it with the left mouse button.
- While holding down the button, move the content element to the new position.
- You can recognize an available position by the orange coloring. As soon as the position appears green, you can release the left mouse button.
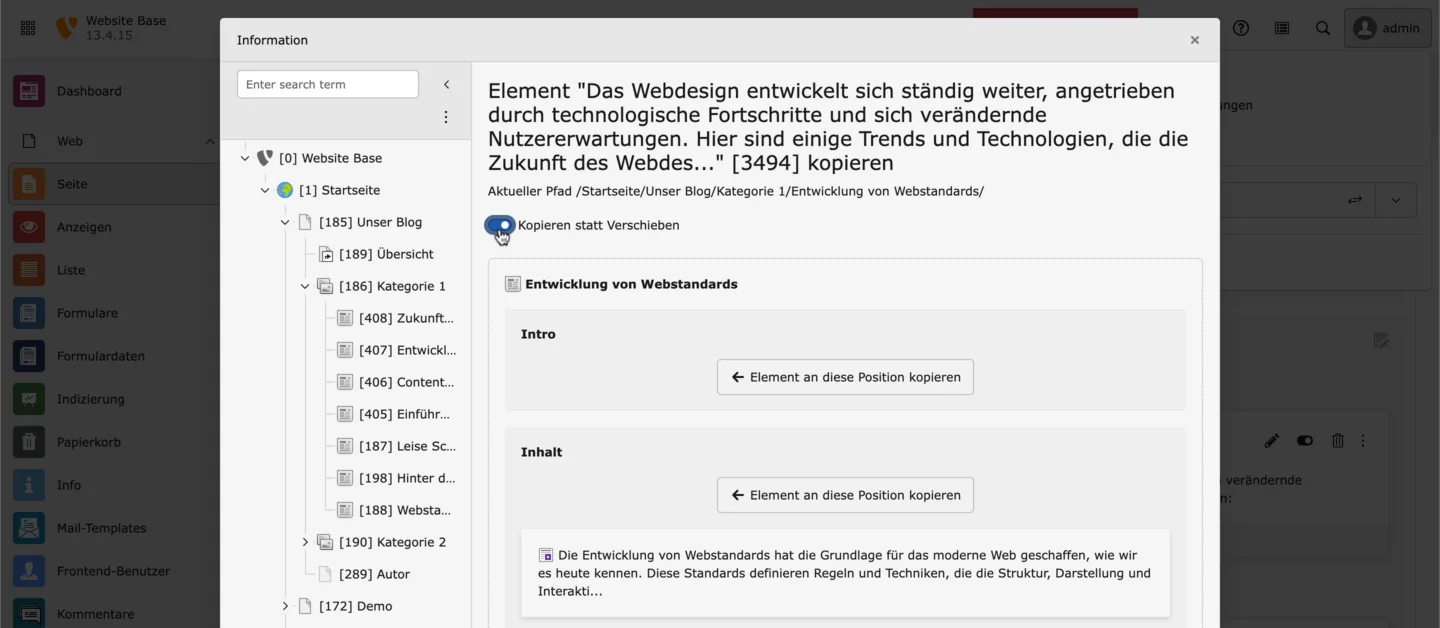
Tip: Since TYPO3 13, drag & drop can be used to move content elements not only within a page, but also between different pages.
To do this, simply hold the element with the mouse and drag it to the desired page. A menu will open where you can specify exactly where you want to move the content. It is also possible to use a slider to set the content element to be copied instead of moved – the content element then remains in its original position and a copy is created at the selected location.
Would you like to know more?
All information about the available editions can be found on the webpage for our TYPO3 Website-Base. You have the possibility to get a Website at a Fixed Price or you decide for a Website as a Service package, with which no further costs for hosting or security and function updates will come up to you.
