

NEW: SG AI – Your AI Assistant for TYPO3 – SEO, (image-)text, images & more!
Page Tree & Pages
The page tree hierarchically represents the navigation points in the frontend and contains all pages of your TYPO3 website. Using the page tree, editors organize the pages – new pages can be created, obsolete pages can be hidden or deleted, and the order of the menu can be determined. Subpages can be expanded and collapsed using the triangle symbol/arrow to the left of the page title. We have compiled the many possibilities that the page tree offers for managing TYPO3 pages for you in this documentation.
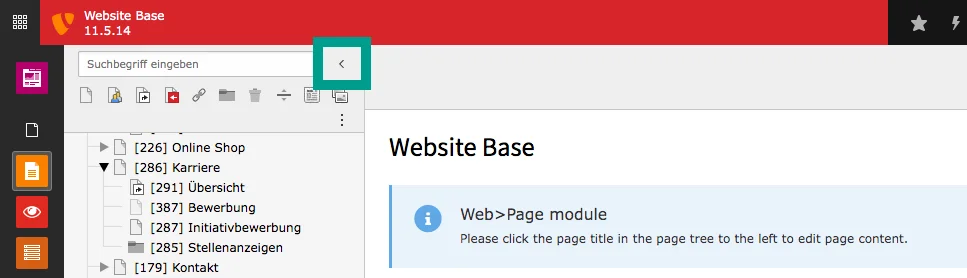
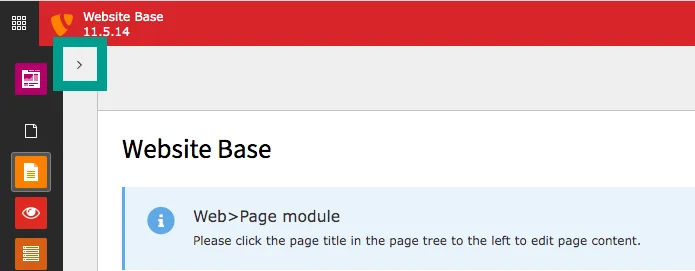
The page tree can be shown and hidden again at any time if necessary. To do this, use the arrows that can be seen in the screenshots.
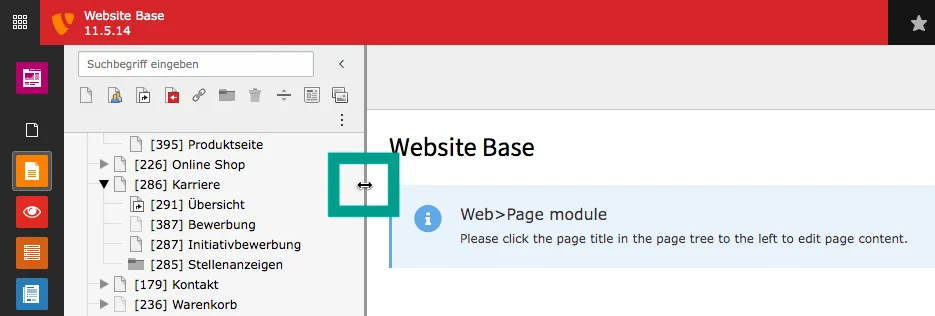
Furthermore, the width of the tree can be adjusted. To do this, move the mouse pointer between the page tree and the content area until the two-sided arrow appears. Keeping the mouse button pressed, you can now reduce and enlarge the area for the page tree while moving to the right and left.
Add pages with drag & drop
The easiest way to create a new TYPO3 page is right above the page tree. If the option 'Create new pages' is selected (text document icon with plus), you will see various icons directly above the page tree. We present four TYPO3 page types in more detail in further documentation: standard page and shortcut page as well as the news page and category page, which are part of the sg_news extension.
- Select the desired page type.
- Click on the corresponding symbol and hold it with the left mouse button.
- Now hold and move the page directly to the required position in the page tree.

Make sure that you insert the new page between two pages. You are in the correct position when a line appears between the two pages. If you drag a page into an existing page, it will be inserted as the first subpage. If you want to add subpages, first expand the page tree where the new page is to be positioned and move the symbol there.
The new page in the page tree is hidden by default (it is not visible in the frontend menu and the URL is not accessible).
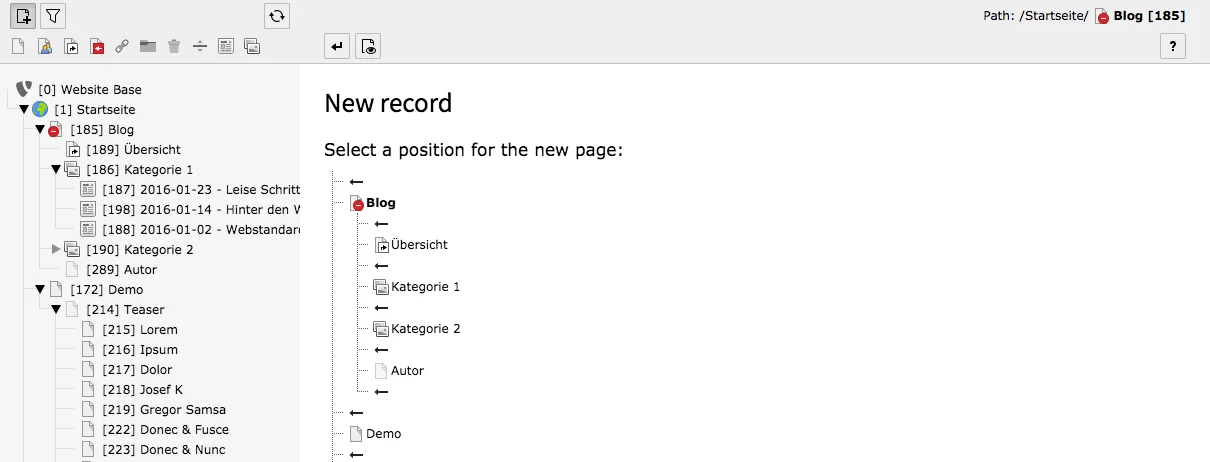
Add new page using the 'Create new' wizard
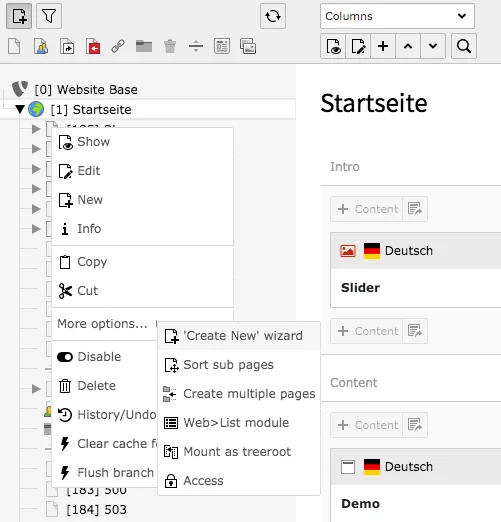
The 'Create New' wizard displays the page tree in the content area and offers the option to create a new page at any position.
- Select the position of the new page.
- The 'Create New' wizard only shows the subpages of the page you right-clicked on. So you only have the option to add a subpage there.
- Right-click in the page tree at the selected location or left-click on the document icon.
- In the menu that appears, go to More options and then select 'Create New' wizard.
- The content area shows the page tree and between each page there is a black arrow. Select the position for the new TYPO3 page and click the black arrow at the position where you want the page to appear.
- You are now in the page properties of the new page.
- Enter the page title and all other necessary information.
- Save your changes.
Add pages with right click in the page tree
- Click with the right mouse button at a selected position in the page tree or with a left click on the corresponding document symbol.
- The new page will appear below this location, but not as a subpage.
- Select New in the context menu that appears to create a new page.
- The page properties are displayed in the content area.
- Enter the page title and all other necessary information for the new page.
- Save your changes.
The page position can be adjusted afterwards, you only have to move the page (see below).
A disabled/hidden page is not visible in the frontend and its URL is not accessible. In the back end, you can recognize such a page by a red circle icon, which is placed over the page icon.
- Click either with the left mouse button on the document symbol or with the right mouse button on the page title.
- In the context menu that appears, choose Disable or Enable (in the lower third of the context menu).
- Which of the two options is in the context menu depends on whether a page is already disabled or not.
Drag & Drop
- Click on the page to be moved with the left mouse button and hold it down.
- Holding down the mouse button, drag the page to the selected position and release. If you drag the page between two pages, the page will appear there. If you move the page into a page, it will be created as the first subpage.
- A window with the options Copy and Move this item now appears in the content area. Choose an action.
- Copying a page that contains subpages does not copy the subpages as well.
- The page is now at the new position in the page tree.
Using the context menu
- Click with the left mouse button on the document icon or with the right mouse button on the page title in the page tree.
- Choose Cut or Copy from the context menu.
- Now use the right mouse button to click on another page title.
- The context menu now contains two additional options: Insert the cut page as a hierarchically equivalent page after the page you clicked on (Paste after) or insert it as a subpage (Paste into). Select an action.
- The page is then at the new position in the page tree.
Via the context menu
- Click either with the left mouse button on the document icon or with the right mouse button on the page title.
- In the context menu that appears, choose Delete (in the lower third).
- Confirm your selection with Delete in the window that appears.
- The page is now deleted.
Drag & Drop to the Recycler
If you have inserted a page in the page tree that has a recycle bin icon, you can use this folder.
- Click on the page to be moved to the recycler with the left mouse button and keep it pressed.
- Holding down the mouse button, drag the page into the trash and release it.
- The pages that are already in the recycler are displayed as subpages of the recycler. If you drag the page to be deleted between two pages, it will appear there. If you drag the page into the trash, you will find it as the first 'subpage'.
- A window with the options Copy and Move this item will appear in the content area. Choose an action (you will probably want to move the page).
- The page is now in the recycler.
Note: Deleting pages may be a problem for SEO reasons, because this URL cannot be reached. If you have many such URLs, this may have a negative impact on your search engine ranking. To prevent this, deleted URLs should always be redirected to the new page or another suitable page. Use the redirects module for this purpose.
It happens again and again that a page or a content element has been deleted or changed unintentionally and you want to restore the original state. The TYPO3 system has considered such situations as well. To undo a change, proceed as follows:
- Right-click on the TYPO3 page in the page tree where you want to undo an action.
- If you have deleted a main page, right-click on the root page (page with a globe symbol - often called home or start page).
- From the context menu, select the third-last option History/Undo (round arrow-clock symbol).
- The content area will now show the record history.
- Under Changelog, you can see the change history oft the TYPO3 page – choose the action you want to undo.
- Click on the icon to the left of the corresponding action (round arrow-clock symbol).
- A preview for rollback appears. Choose between the options Rollback all changes shown and Rollback single record.
- The selected change on the TYPO3 page has now been undone.

Would you like to know more?
All information about the available editions can be found on the webpage for our TYPO3 Website-Base. You have the possibility to get a Website at a Fixed Price or you decide for a Website as a Service package, with which no further costs for hosting or security and function updates will come up to you.
