
NEW: SG AI – YOUR AI ASSISTANT FOR TYPO3 – SEO, (IMAGE-) TEXT, IMAGES & MORE!
Filelist
The filelist allows centralized management of all files - especially images and graphics. The files are stored in hierarchically structured directories.
The advantage of storing files centrally is, for example, that images that are used several times only need to be uploaded once. The directory tree can be adjusted at any time. New directories and subdirectories can easily be added or existing directories and/or files can be moved.
Overview
The directory tree is shown on the left side of the screenshot. It can be designed freely, i.e. you can use it to display the pages or the page tree, but you do not have to. If another structure makes more sense to you, create the directories according to your wishes. You can also move, copy and delete the folders afterwards. Like the page tree, the files tree can be expanded and collapsed using the arrow at the top right of the tree and, like the page tree, its width is variable. To adjust the width, move the cursor between the directory tree and the content area until a two-sided arrow appears. Then hold down the left mouse key and move the mouse to the left or right to adjust the width of the area for the tree.
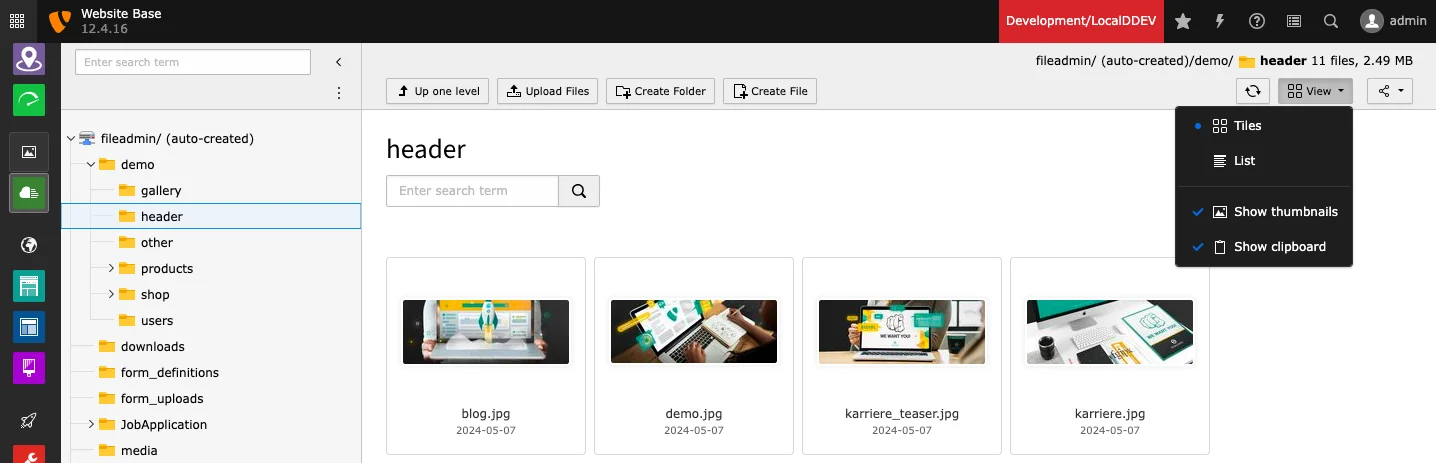
Similar to the page module, you will find several options in the top right-hand corner, some of which are also available in the page and list module. The arrows can be used to reload the page. You can also bookmark a page in the file list or copy the URL to the file folder. The options for the view are special: here you can set whether the files are displayed in tiles or as a list, and whether thumbnails and the clipboard should be visible.

No matter in which folder you are in the directory tree, you will always see the contents of the folder in the right pane. Above the content area, you will always see four options. By clicking on the button Up one level you will get one level up. By clicking on Upload files a window opens where you can upload files. Files can also be uploaded with drag & drop (see screenshot).


Click on Create folder to open a view in which you can add a new folder. Here you can also select a different location for the folder. Clicking on Create file takes you to the options to add media files via URLs (YouTube or Vimeo) or to create text files. However, the latter is rarely relevant for editors.


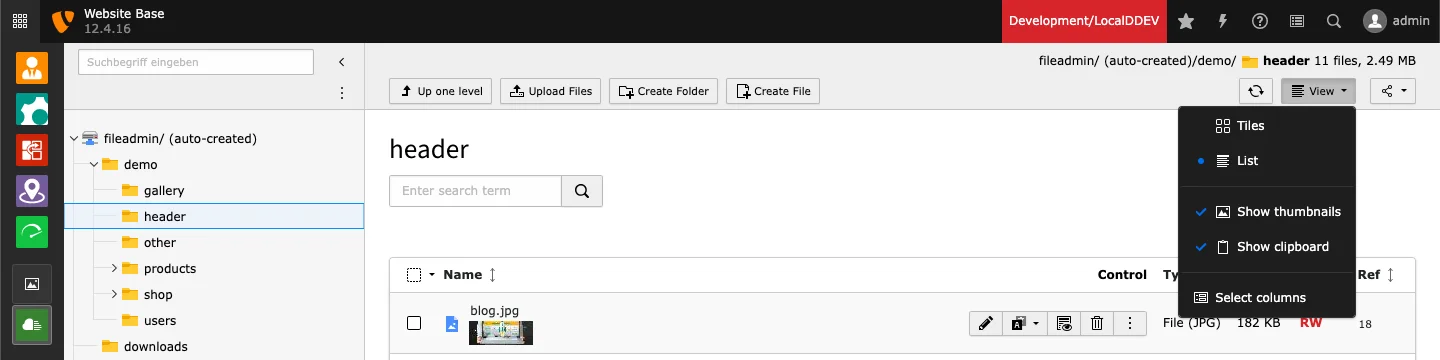
Select columns
In the list view, some information about the individual files is displayed as 'columns' in the list. These are usually: file type, size, rights (RW – read and write) and how often it is used (Ref). If you need further information in the lists, e.g. height and width or alternative text, you can individually activate the columns that you need for your daily work.
To do this, simply click on View in the top right-hand corner of the file list, then on Select columns and select the desired columns by clicking on them. The column selection only appears if the list view is activated. Selected/activated columns can be recognized by their green icon (see screenshot). When you have made your choice, click Update. The selected information will now be visible in the list.

Selection
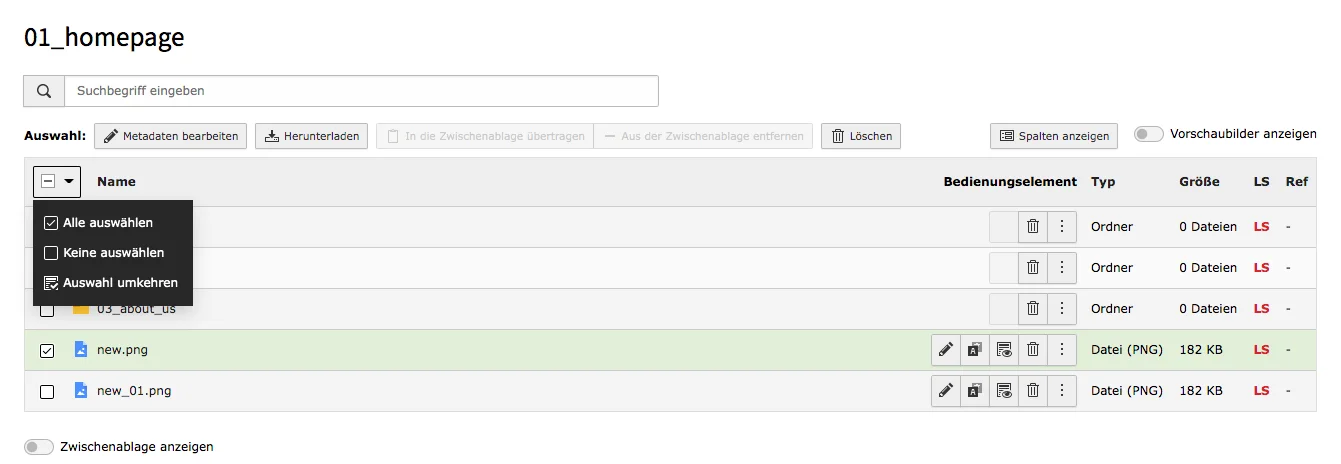
You can select one or more objects at any time using the checkboxes to the left of the elements. In the tile view, files can only be selected one after the other. In the list view, clicking on the top 'checkbox' also opens the options Check all, Check none and Toggle selection. These options allow you to work particularly quickly when many objects need to be edited, for example.
Once you click a checkbox, more options appear for you to choose from. These are . We will discuss the clipboard options below, as they are only usable when the clipboard is enabled. All other options are also available for individual items, but can also be used for multiple items at once, for example, to work faster and more efficiently. The following section describes the options for individual elements in more detail.
As soon as you click on a checkbox, further options appear for selection. These are Edit Metadata, Download and Delete. If you have activated the clipboard in multiple selection mode, further options will appear: Transfer to Clipboard and Remove from Clipboard. We will go into more detail about the clipboard below. All other options can be applied to individual elements. These options for individual elements are described in more detail in the following section.
Options
Files have different editing options depending on the file format. Four options are always visible in the list view.
- Edit Metadata of this file: You can edit the title, description and the alternative text in the default language and adjust categories here.
- Translate metadata: After clicking the icon the option to edit the metadata in another language appears. After clicking on the option the metadata will open. You can translate the title, description and alternative text and select categories.
- Show: Opens the file in a new window.
- Delete
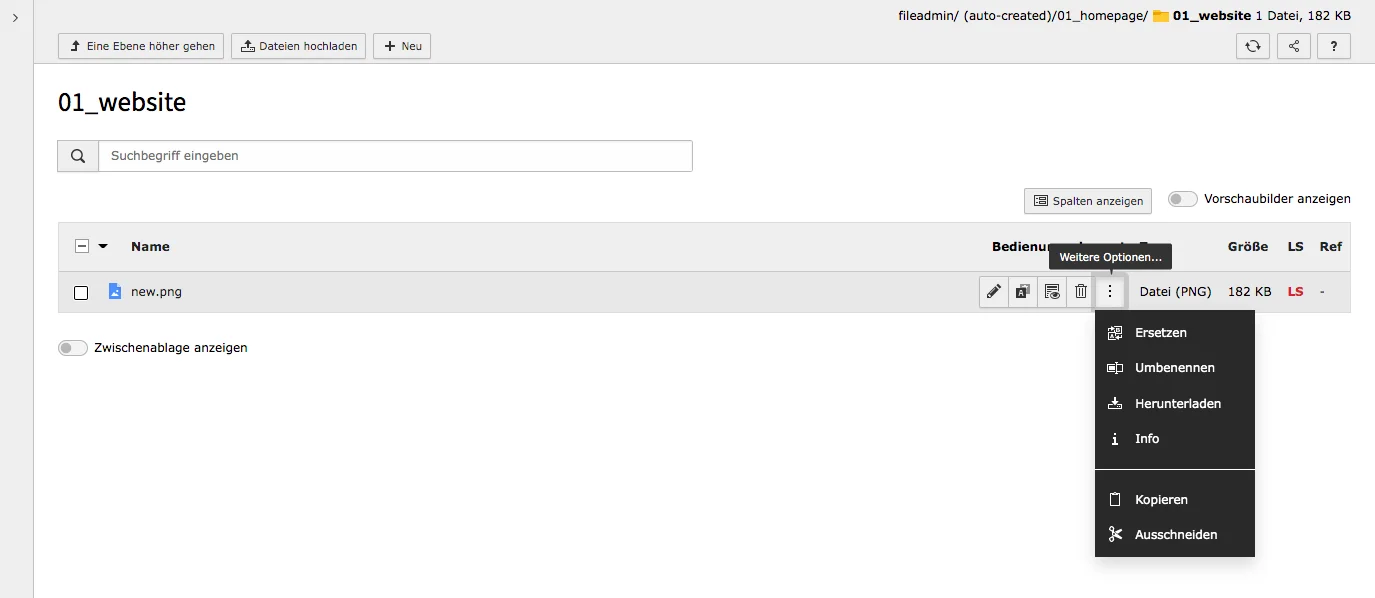
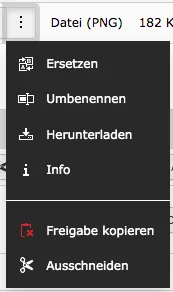
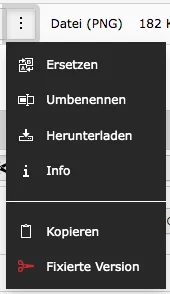
Clicking on the three dots after the visible options will open more options:
- Replace: The current file can be replaced by another file on your hard drive. If the file is used in the frontend, the new version is also immediately visible on the website.
- Edit content: This option is only available for textfiles and is not visible in the screenshot (grey button without symbol).
- Rename: Allows to rename already uploaded files.
- Download: Downloads a single file. To download multiple files, use the checkboxes to the left of the files and then the Download option above the file list.
- Info: Opens a window in a lightbox with all information about the file e.g: Size, dimensions, filename, file type.
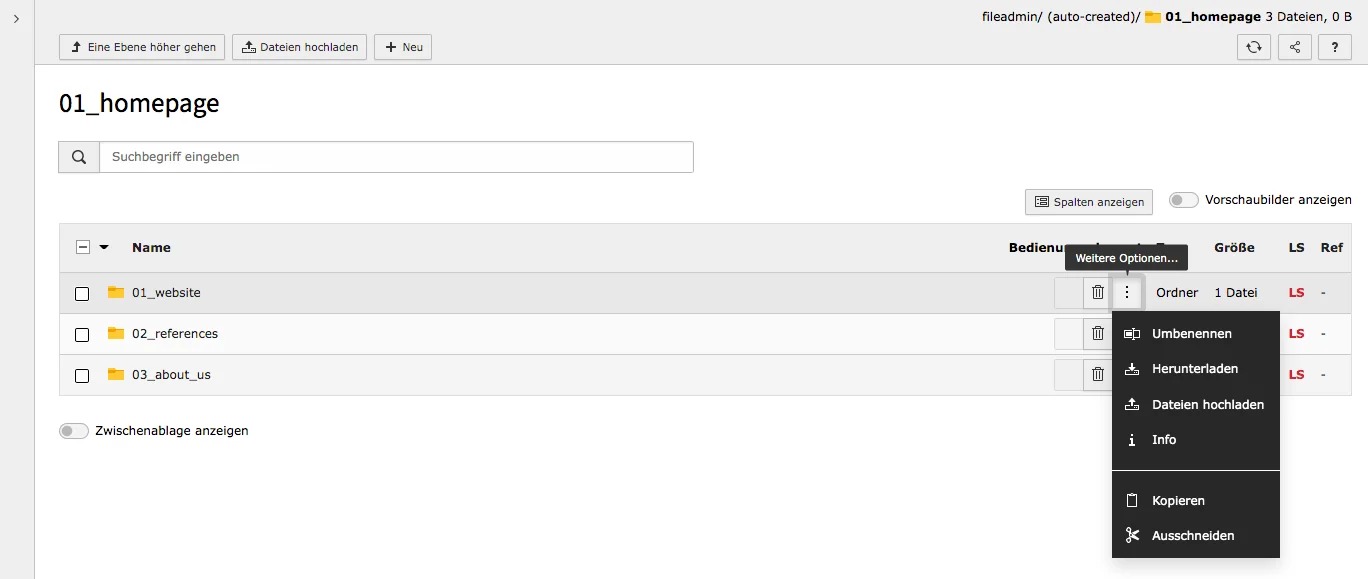
Folders have only one visible editing option: delete. Other options are: Rename, Download, Upload Files, Info, Copy and Cut.
In the tile view, options are opened by right-clicking on the file. However, not all options from the list above are available.
Copy or move files/folders
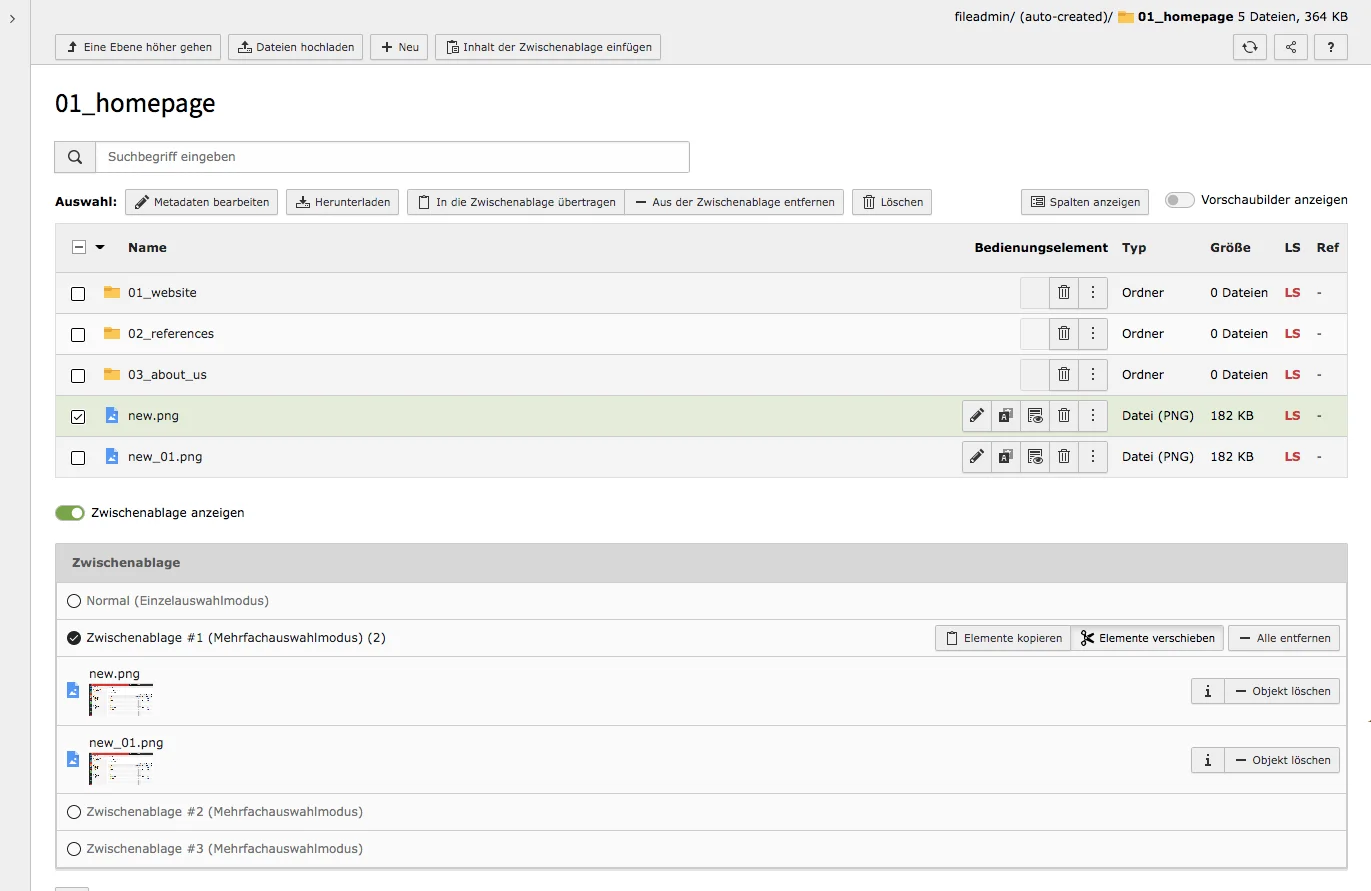
In the upper right corner, in the view settings, you can set whether the clipboard should be displayed. If the clipboard is displayed, it can be found under the files. There you will see different modes: a single record mode and three times a multi-selection mode. By default, the mode normal (single selection mode) is activated, with which only single objects can be copied or moved, even if the clipboard is not displayed.

Single record mode
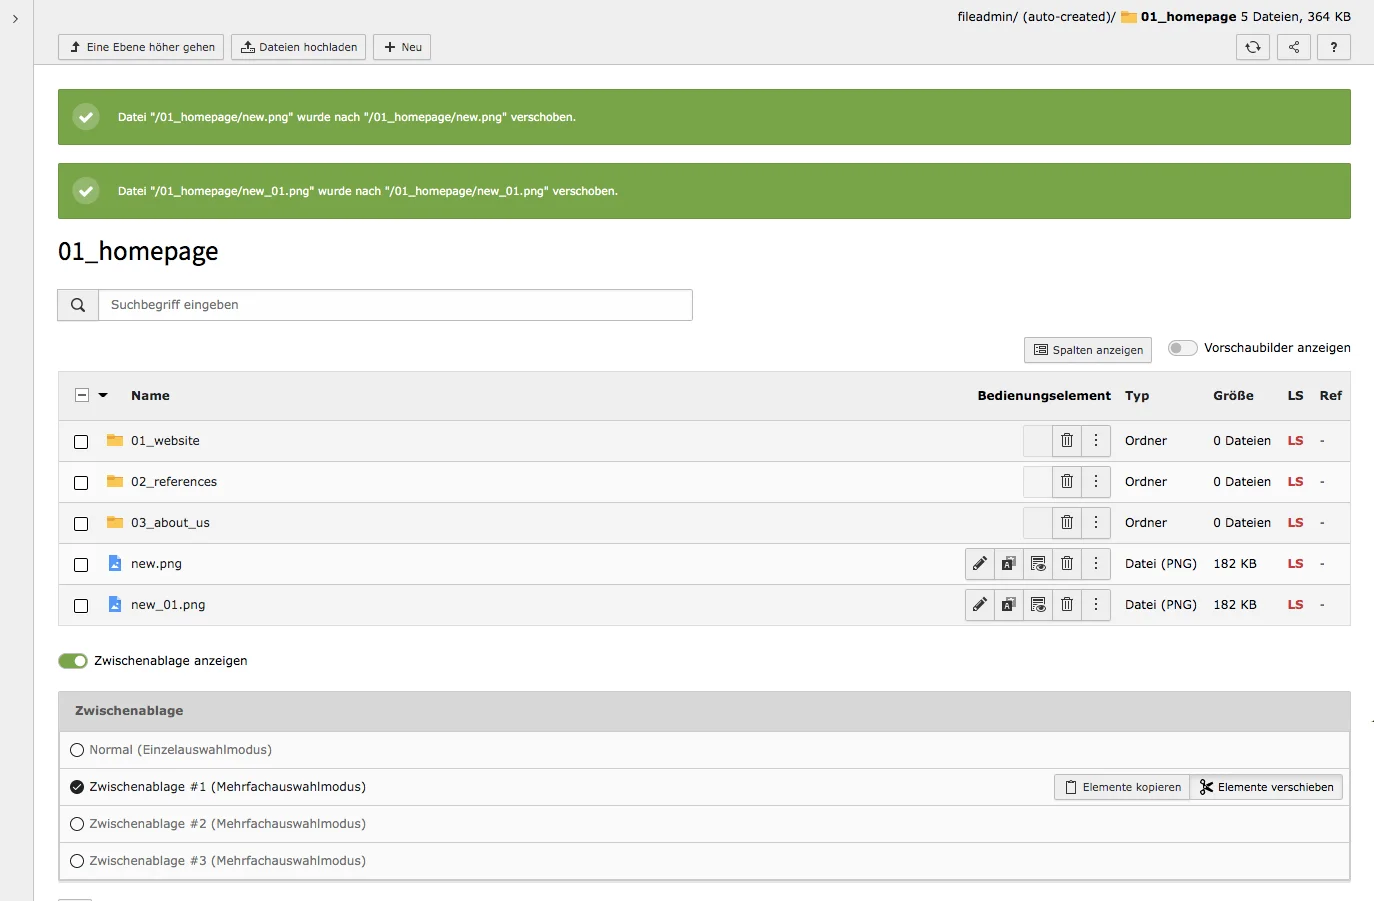
By default, the normal mode is set when you display the clipboard. This allows you to move or copy one item at a time. In normal mode, or when the clipboard is not enabled, each object can be copied or cut individually. As soon as you have chosen one of the two options, the object appears in the clipboard. If you want to cut instead of copy or vice versa, simply click the button in the clipboard for the desired action: Copy elements or Move elements.

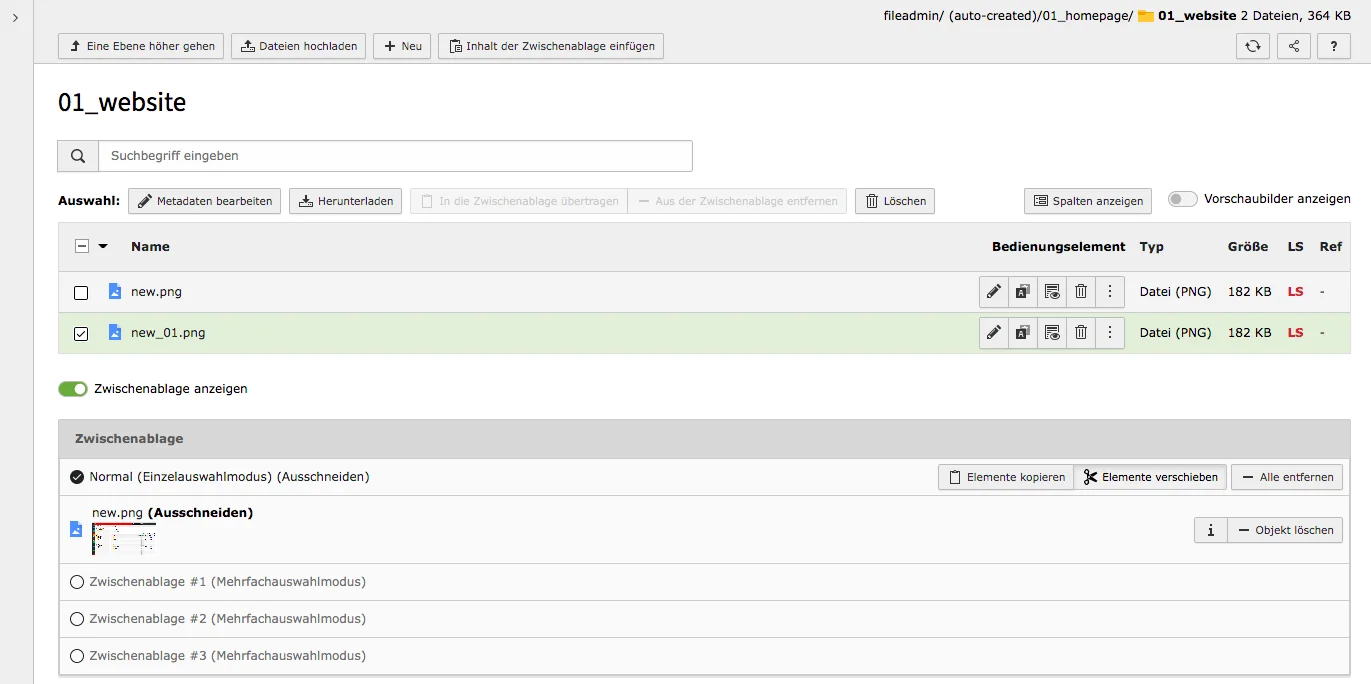
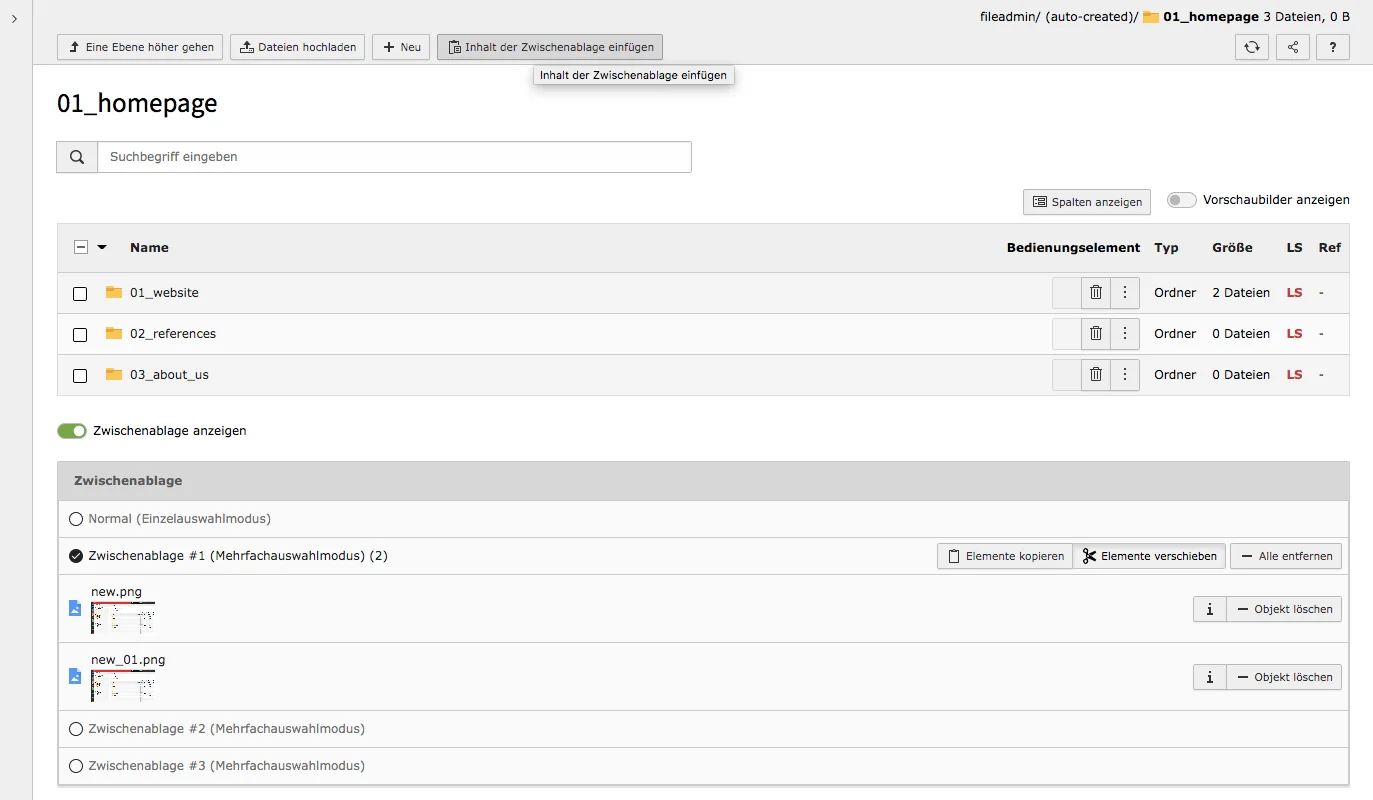
Once you have copied or cut an element, another button with the Paste in clipboard content option will appear above the file list. This button is visible even if the clipboard is not activated but an element was copied/cut. Use it to place the element to the desired position.
If you want to remove the object from the clipboard again, you have several options in the single selection mode. First, you can use the more options of an element. When you click on the three dots next to a copied element, the Copy Release option appears instead of the Copy option. With this option you reverse the selection for copying. With a cut element you will find the Cut release option, with which you will reverse the selection to cut. These options are available even if the clipboard is not enabled. When the clipboard is enabled you can also use the Remove All or Remove object buttons.
Multi-selection mode
The name already gives it away: In multiple selection mode, several objects can be moved or copied at the same time. Basically, the clipboard works in the same way in multiple selection mode as in single selection mode. When you switch to multiple selection mode, the options for copying and cutting disappear for the individual items. To move objects to the clipboard, the checkboxes to the left of the individual elements are used. Either select individual items, or use one of the following options Check all, Check none, or Toggle selection, as described earlier in this documentation.
The selected objects can then be transferred to or removed from the clipboard using the selection options.

You can also remove the elements from the clipboard. To remove a single element use the Remove item button near the corresponding element, to remove all the elements from the clipboard click the Remove all button.
Summary: Move or copy content
Would you like to know more?
All information about the available editions can be found on the webpage for our TYPO3 Website-Base. You have the possibility to get a Website at a Fixed Price or you decide for a Website as a Service package, with which no further costs for hosting or security and function updates will come up to you.
